


Each object has an origin point. The location of this point determines where the object is located in 3D space. When an object is selected, a small circle appears, denoting the origin point.
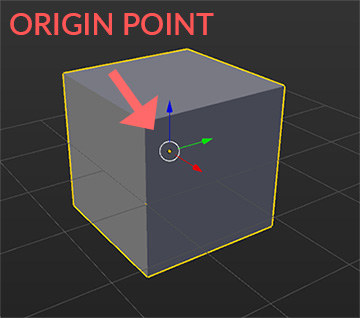
The location of the origin point is important when translating, rotating, or scaling an object. For example, if you move the object and want to snap it to the grid (by holding CTRL), Origin Point will snap to the grid, not the object itself. Also, when you rotate the object, it will rotate from the Origin Point (Pivot Point). Scaling works the same. It scales from the Origin Point.
Origin customization
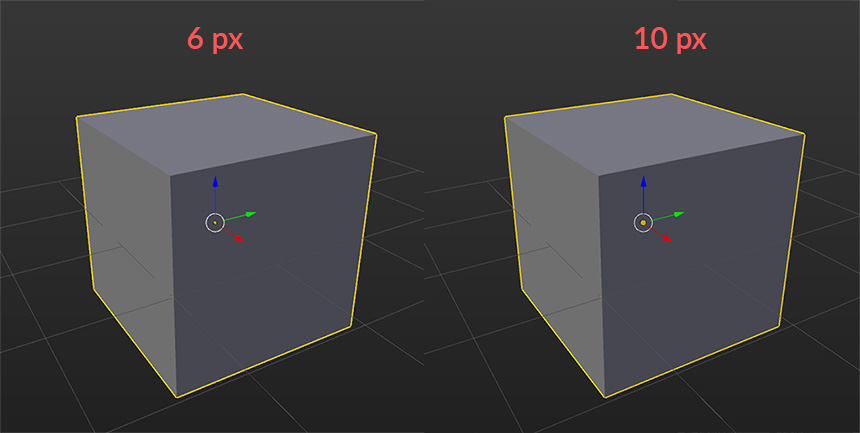
You can change the Size of the Origin Point. Go to File > User Preferences and inside Interface tab you will find Object Origin Size.
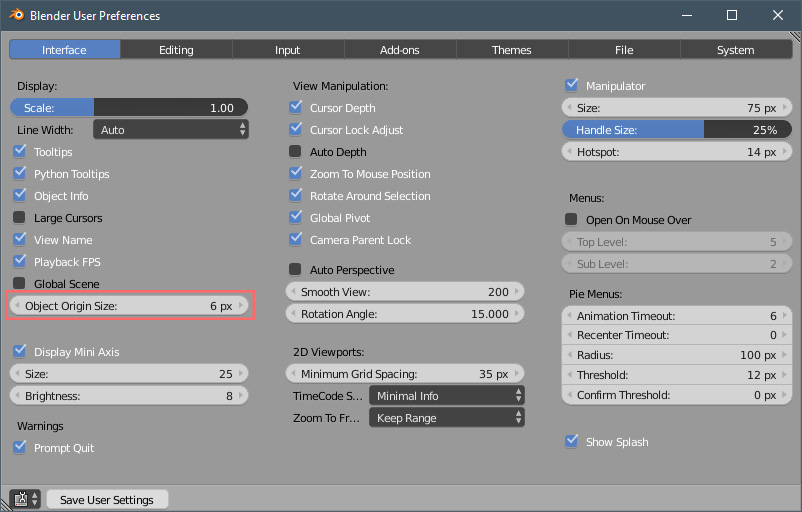
By default, it’s set to 6 px. Let’s try to set it to 10px. It looks a lot bigger now. It’s up to you if you want to change the size.
Change origin position
You can change the Origin position in a few different ways:
1. Set Origin to the Center of the Object - Select the object and press SHIFT+CTRL+ALT+C (choose Origin to Geometry option).
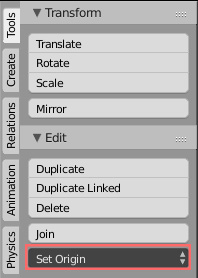
Instead of using the shortcut, you can press T to open the left side panel, and inside the Tools tab, you will find the Set Origin button.
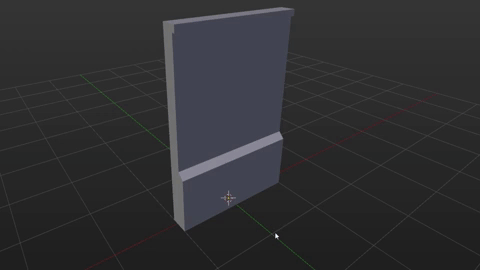
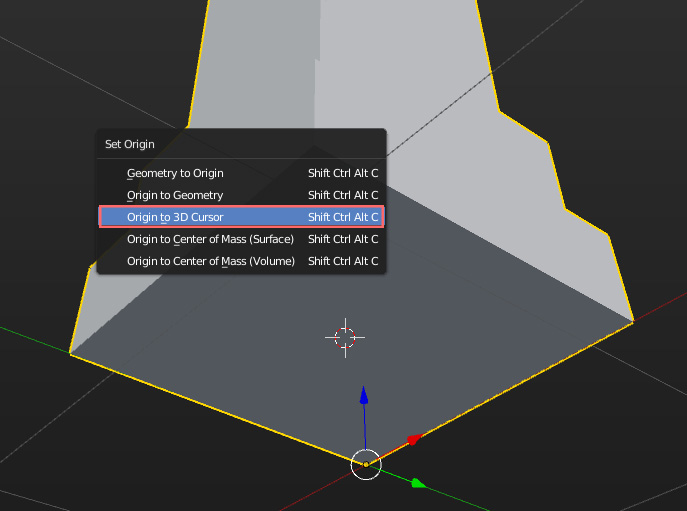
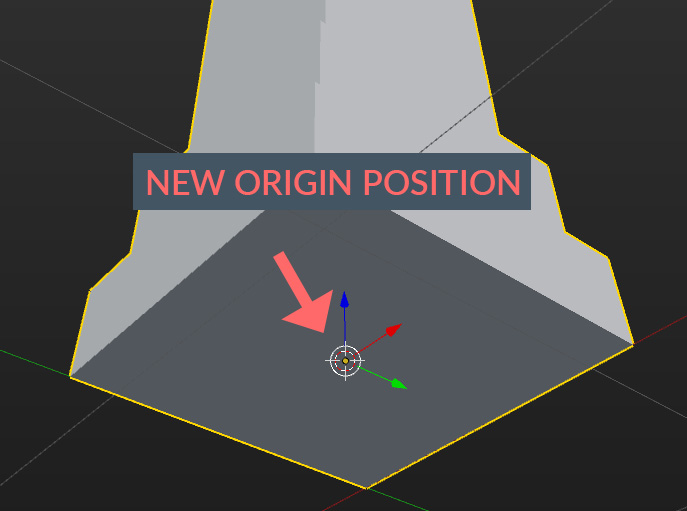
2. Set Origin to 3D Cursor - First, you need to set 3D Cursor position. You can do it by pressing LMB anywhere inside 3D View.
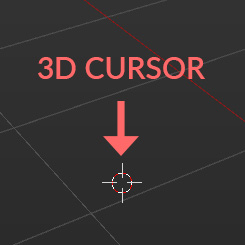
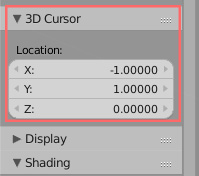
If you want to be very precise with 3D Cursor location, press N to open the right side panel and look for 3D Cursor tab. Here you can set x, y, z location of the 3D Cursor.
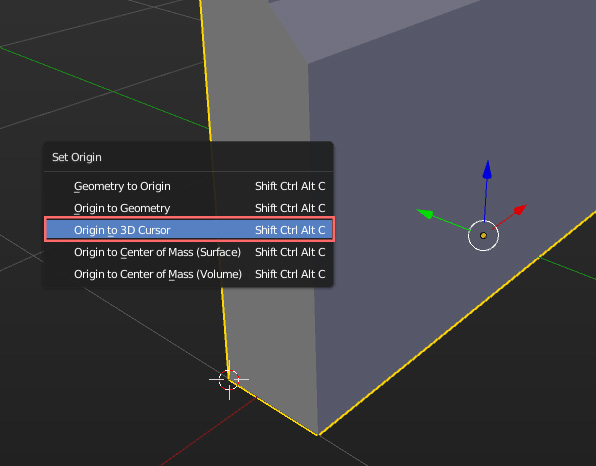
After you set 3D Cursor location, select your object and Press SHIFT+CTRL+ALT+C (choose Origin to 3D Cursor option).

3. Set Origin to a Vertex Position
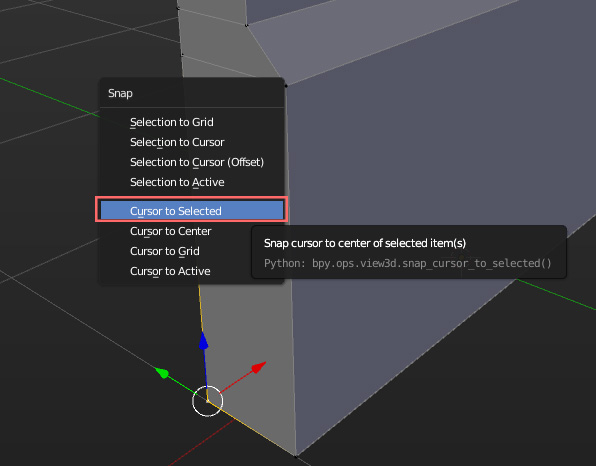
Select the object and press TAB to enter the Edit Mode. Select any Vertex using RMB and press SHIFT+S (choose Cursor to Selected option).
Now press TAB to exit the Edit Mode and press SHIFT+CTRL+ALT+C (choose Origin to 3D Cursor option).
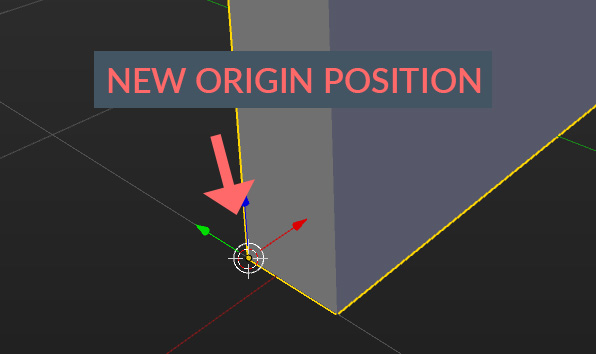
This is very useful when creating modular assets. You can set Origin at the bottom corner for easy grid snapping.
4. Set Origin to a Face Center Position
Select the object and press TAB to enter the Edit Mode. Select any Face using RMB (make sure you are in Face Select mode) and press SHIFT+S (choose Cursor to Selected option).

Now press TAB to exit the Edit Mode and press SHIFT+CTRL+ALT+C (choose Origin to 3D Cursor option).
Thank you for stopping by! :)
If you want to support me, you can do that by subscribing to my YouTube channel or by buying my Game Assets. This helps me to create more content for you guys! Appreciate any support :)